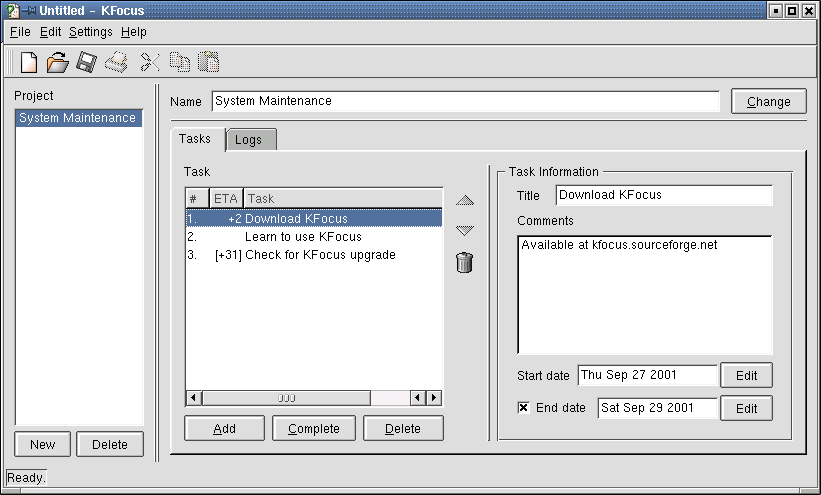

Once you create a project, you are ready to add tasks to your project. First, make the tasklist visible by clicking on Tasks in the project information panel. Click on Add below the tasklist to add a task to your project. The Task Information panel to the far right of the tasklist lets you change the task title and comments. You can also change the position of your task using the arrows to the immediate right of the tasklist.
Every task has a start date. By default, this is set to the day the task is created. For some tasks, you will want to set the start date to a day in the future.
When the start date for a task is in the past or is the same as the current date, the task is considered active. When the start date for a task is in the future, the task is pending . In the tasklist, pending tasks are marked with brackets in the ETA column and they always appear below active tasks.
Tasks can optionally have an end date. In the tasklist, active tasks with an end date appear above active tasks with no end date. Likewise for pending tasks. The ETA column shows the number of days from the current day to the end date of tasks in the tasklist. When an ETA becomes negative, it means the end date for the task has passed.

When you are done with a task, click Complete below the tasklist. The Complete Task dialog will appear. To complete the task and remove it from the tasklist, click Continue at the bottom of the dialog. If you change your mind about completing the task, click Cancel instead.
The optional section at the lower left corner of the dialog lets you generate a log when you click Continue. Click the checkbox next to it to enter the log information.
The right side of the dialog is a second optional section; use it to schedule a followup task. Click the checkbox at the top to enter information for the followup task.